


Paper garlands are always so much fun. It’s a really affordable way to decorate a party. Well, if you have the time to make one. They don’t necessarily have to really intricate {even though those are really beautiful}. This DIY is all about simple and easy. All you need to know how to do is punch circles. You can even have some fun by alternating the circle sizes or tying little bows in between groups of circles.

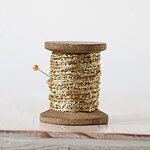
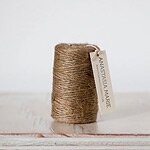
What you need: 1 colored paper for dots | 2 one-inch circle punch | 3 1/8″ hold punch | 4 metallic string/ribbon

STEP ONE: Punch circles.
Choose your paper colors and punch away with your circle punch. You’ll needs lots and lots of circles.


STEP TWO: Punch holes in your circles.
Take your hole punch and gather several of the circles together and punch a hole right in the middle. You don’t have to be very accurate for this. Just eyeball it and punch.

STEP THREE: String ‘em up!
Take your metallic string/ribbon and run it through each circle. If you can somehow attach your string to a needle, that really helps a lot. Make sure you alternate the colors somewhat. It’s okay if you have two circles of the same color in a row. It adds to the personality of the garland.


STEP FOUR: Fold ‘em down.
Fold every other circle in half. You don’t have to very accurate here either. Fold as best as you can, but no need to have the circle’s edges match up.

And now you’re FINISHED! Hang it up. Have fun with it. I created one that’s about 1.5 feet long {just for this DIY}, but I highly recommend making it much, much, much longer. Make one that can stretch across the room and loop here and there.


By Anastasia Marie
13 comments
Leave a Sweet Comment
© 2015 Anastasia Marie. All Rights Reserved.
love it and paper garlands are a cheap and fun way to decorate
This would be a fun way to decorate our room for Getaway! Thanks for the idea.
Great idea for my garden party!
I honestly think this is one of the cutest handmade decorations! Love the various colors. Imagine lacing several of those garlands together on a wall and seeing what effect that’d make. Great pick for a DIY, Stace!
This is so adorable! I want a mini one for a party necklace! lol.
Thank you for all the love! And Esther, I never thought of that, but that does sound fun!
very like! did you make this one up?
Sophia – yes ma’am. At least I haven’t seen this particular paper garland anywhere else!
[…] paper garlands. Especially when they are glittery ones. This garland uses the same idea as a past DIY garland that I’ve done here on the blog, but I’m using scallops this time. So let’s learn […]
This is beautiful! Would you recommend using cardstock or regular paper?
Crystal: Cardstock! Regular paper will probably have a hard time not crumpling too much.
[…] o estas dos otras opciones, hilvanadas a mano, de Dearest Nature y Anastasia Marie (en cada enlace muestran su tutorial). Por aquí nos ha parecido soluciones ideales para fiestas o […]
[…] spruce up a party, a nursery, or any room you want to have a pop of beautiful color. Get the full paper garland diy over at Anastasia Marie. Have […]