


Gift Wrap: Polka Feather

Remember my original feathered gift wrap post? Well, I’m recycling the paper feather for another gift wrap post because I love how paper feathers look on packages. Supplies needed:
White polka dot wrapping paper + tape (this paper was found at Target)
Translucent sleeve
Mini card
Mini glitter clothespin
White paper
Chunky glitter
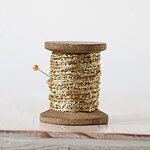
Iridescent + white twine
Glitter glue
Start by making your glittered paper feather. Cut out a feather in a shape you prefer from the white paper; it can be super simple or more intricate like mine. Apply a line of glitter glue down the middle and cover with the chunky glitter. I personally love chunky glitter because it has more texture than fine glitter, but if you prefer yours fine, that’s perfectly fine.
While your feather is drying, begin wrapping your package in the polka dot paper and secure with double sided tape. We never want to see tape on a wrapped gift (unless it’s washi tape, of course). Using the twine, wrap it around your package a few times and secure in the back with a knot. Insert your card into the sleeve, slide it underneath the twine, and pin your paper feather onto the sleeve with a mini clothespin. I used the same color of glitter clothespin as the glitter on the feather, but if you want to play around with color, the power is in your hands!


By Anastasia Marie
No comment
Leave a Sweet Comment
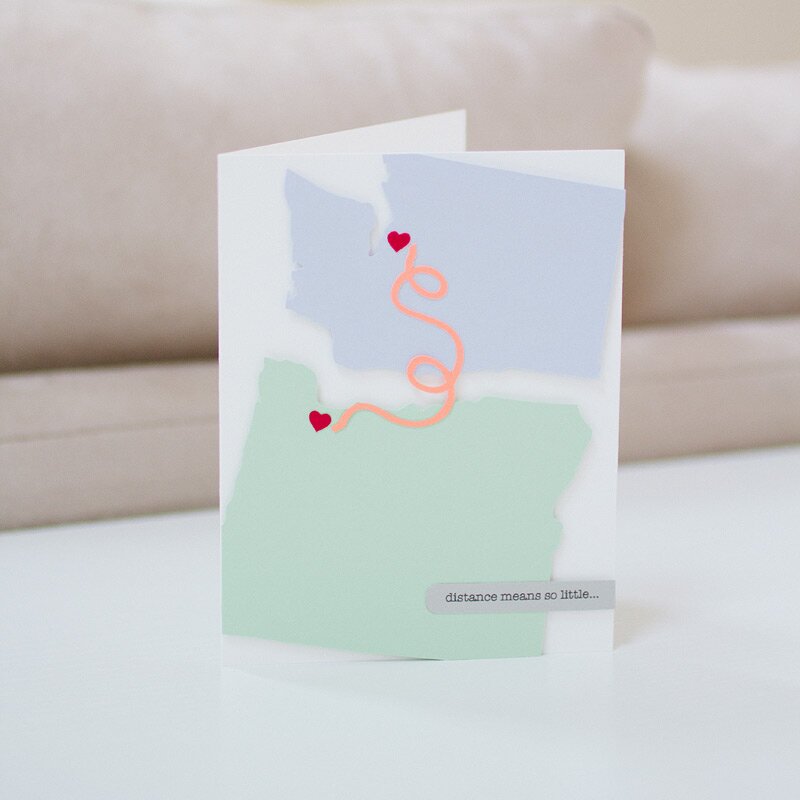
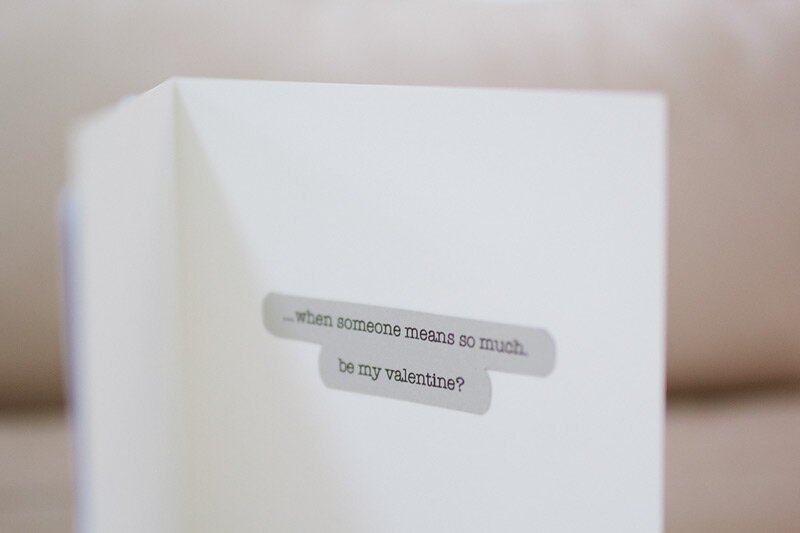
This custom card speaks for itself. He lives in Portland, Oregon. She lives in Seattle, Washington. Two hearts connect the two with the words “distance means so little when someone means so much.” Did anyone else melt?

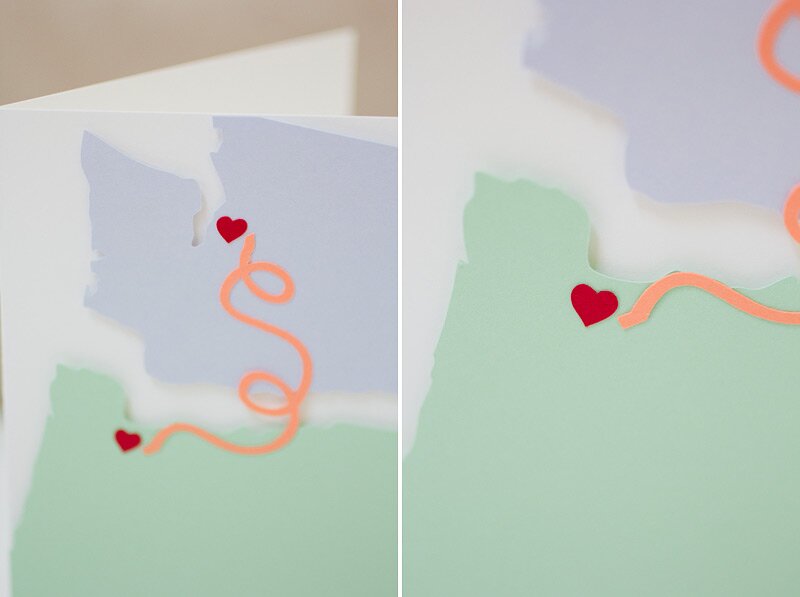
See more of my custom cards here.
By Anastasia Marie
1 comment
Leave a Sweet Comment
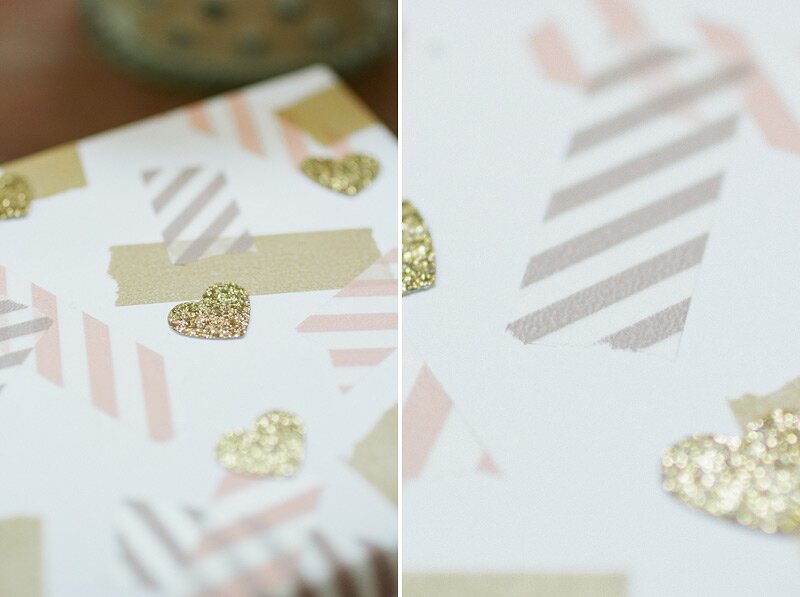
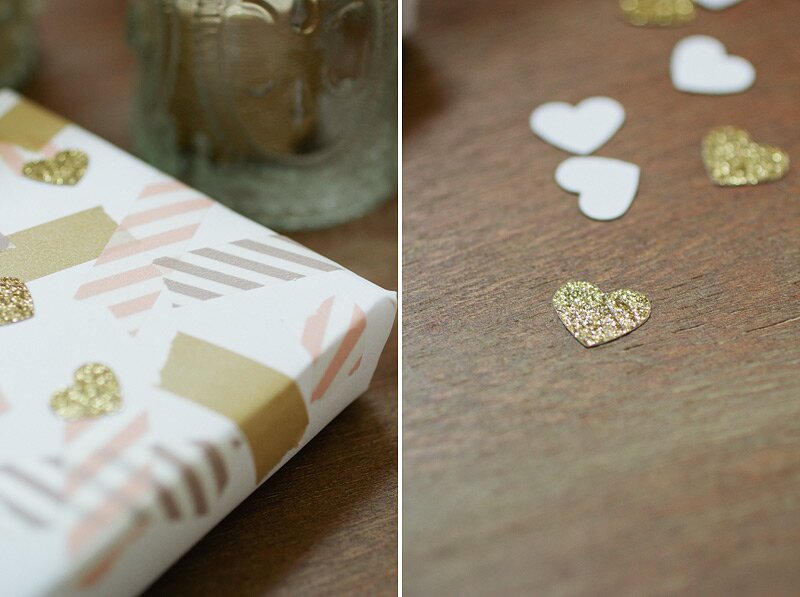
Gift Wrap: Hearts + Washi
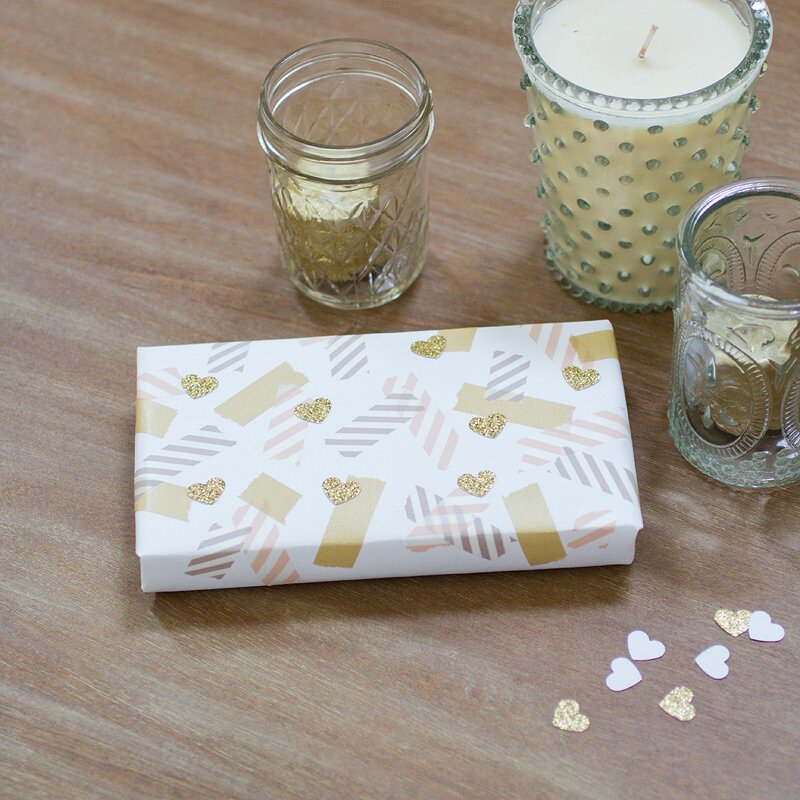
With Valentine’s Day around the corner, here’s a fast (but still super pretty) gift wrap idea for you. Supplies needed:
White wrapping paper + tape
Gold glitter hearts
Washi tape
Glue (preferably not a glue stick)
Wrap your package in the white wrapping paper. Next, take stripes of washi tape and scatter them on the wrapped package. Vary the lengths and patterns for that handmade touch. I chose pastel hues in honor of Valentine’s Day. After that, dab a bit of glue on a golden heart and place it where you think it’ll look nice. Repeat until you’re happy with the results.

By Anastasia Marie
1 comment
Leave a Sweet Comment
-
Julie (xfallenmoon)
I’m totally crushing on gold right now. This is seriously the cutest packaging ever. I may just do something like this for my husband’s gift. Thanks!
http://xfallenmoon.blogspot.com/
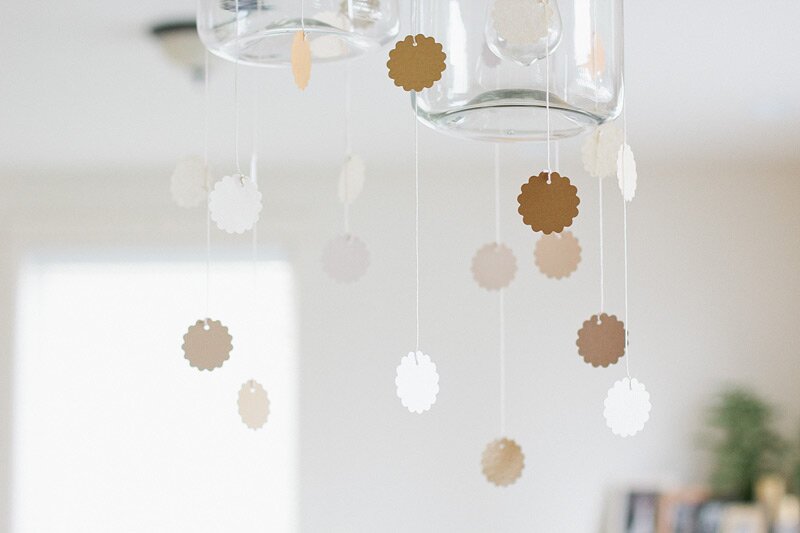
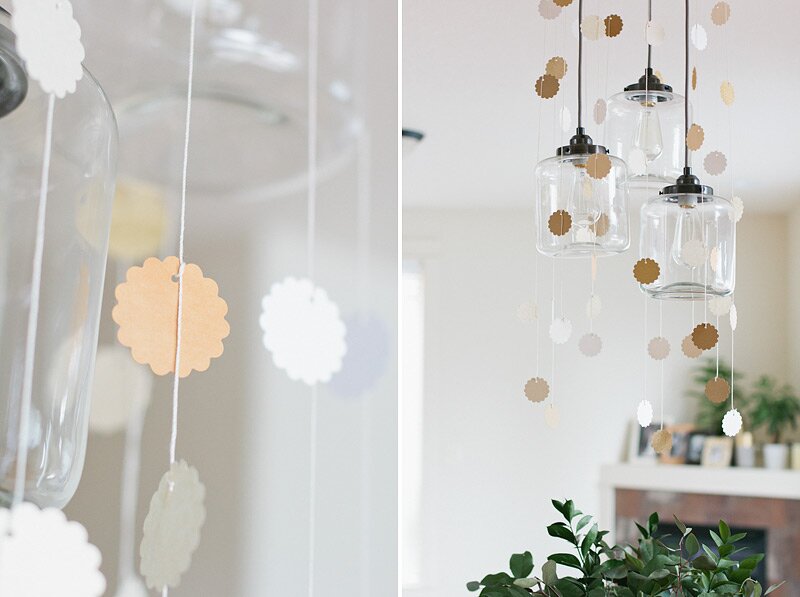
DIY: Scallop Garland
We threw a bridal shower / going away party for my sister last weekend. We kept it simple and sweet. I used whatever I had available already in my home, and just popped out to the store to buy greenery for the table. Gold and ivory tablecloths, greens in jars, and various long candlesticks (so they would burn at different speeds and create candles of various lengths). I also handmade a simple scallop garland to hang from the dining room lamp. You can either make this a long garland — or just in pieces like I did, hanging them in a circle around the lamp. These photos were taken long after the party was over and everything was cleaned up, so all the details aren’t here.
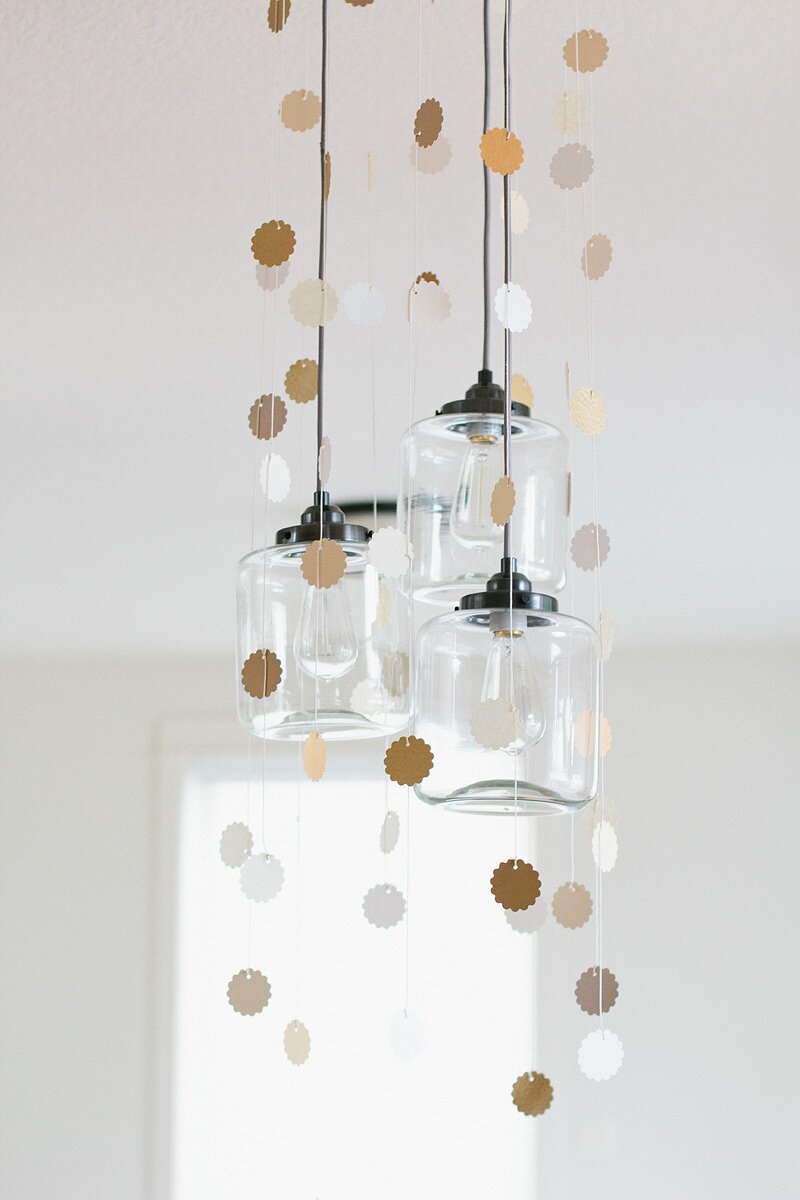
Supplies needed (besides the paper):
2″ Scallop Punch (I used the brand)
1/8″ Hole Punch
Cotton string
Scissors
To make the garland, punch out scallop circles from various paper textures and colors. I kept the color palette ivory, taupe, and gold since those are some of the key colors of my sister’s wedding. Hole punch the scallops. Cut a good length of string and tie one scallop to the very end. String the next scallop on and tie it on by looping that same end through. To keep it looking smooth, alternate the various scallops by color and texture. Also, don’t secure them on with the same distance in between; instead, vary the distances up and you’ll save yourself the headache of trying to make it ‘perfect’ (this is a big time saver).
Note: a trick to keep the scallops hanging naturally, don’t tighten your loop around each one until you position it properly. Making the loop too tight makes the scallops stick up awkwardly instead of making them look like they’re just falling.

By Anastasia Marie
1 comment
Leave a Sweet Comment
-
Laura Jolly
Lovely. Thank you!
Custom Card: Tree Shopping
This card was custom created by a wife to give to her husband on Christmas. Finding a tree and chopping it down yourself is a big tradition here in the Northwest and this card depicts just that.


See more of my custom cards here.
By Anastasia Marie
2 comments
Leave a Sweet Comment
-
Marketa
What a cute card! Is it all paper? It looks like felt in some of the photos…Either way, it’s very adorable!
-
Anastasia Marie
Marketa: yes, it’s all paper! And thank you!
- Next Page »
© 2015 Anastasia Marie. All Rights Reserved.
Aww this is too cute! <3