


Gift Wrap: Polka Feather

Remember my original feathered gift wrap post? Well, I’m recycling the paper feather for another gift wrap post because I love how paper feathers look on packages. Supplies needed:
White polka dot wrapping paper + tape (this paper was found at Target)
Translucent sleeve
Mini card
Mini glitter clothespin
White paper
Chunky glitter
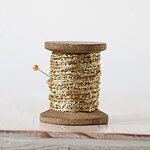
Iridescent + white twine
Glitter glue
Start by making your glittered paper feather. Cut out a feather in a shape you prefer from the white paper; it can be super simple or more intricate like mine. Apply a line of glitter glue down the middle and cover with the chunky glitter. I personally love chunky glitter because it has more texture than fine glitter, but if you prefer yours fine, that’s perfectly fine.
While your feather is drying, begin wrapping your package in the polka dot paper and secure with double sided tape. We never want to see tape on a wrapped gift (unless it’s washi tape, of course). Using the twine, wrap it around your package a few times and secure in the back with a knot. Insert your card into the sleeve, slide it underneath the twine, and pin your paper feather onto the sleeve with a mini clothespin. I used the same color of glitter clothespin as the glitter on the feather, but if you want to play around with color, the power is in your hands!


By Anastasia Marie
No comment
Leave a Sweet Comment
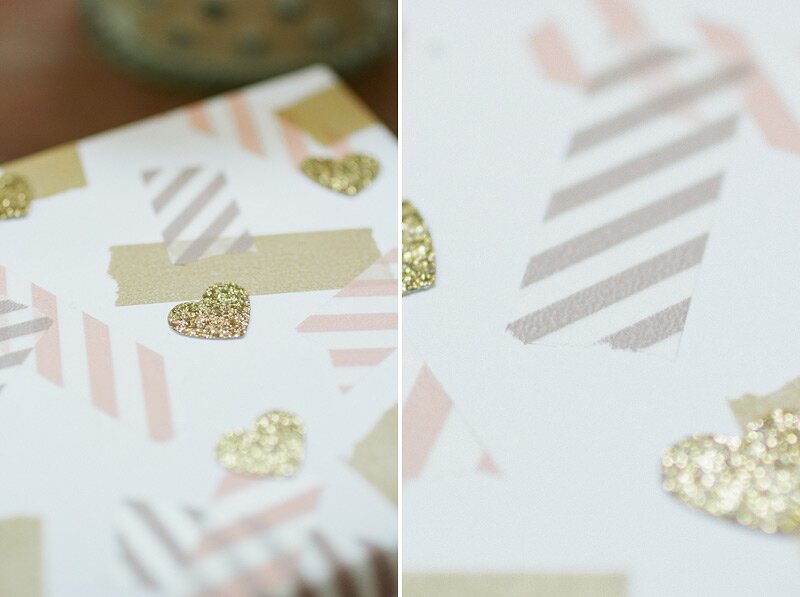
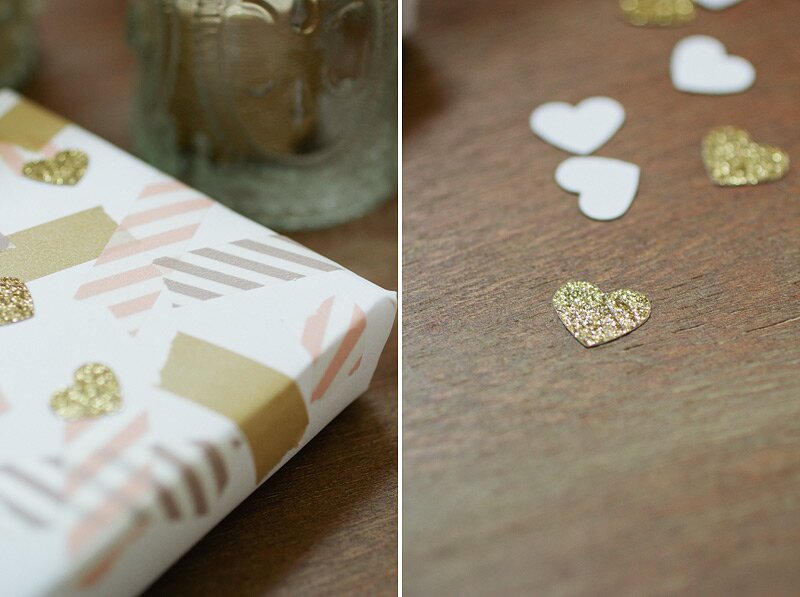
Gift Wrap: Hearts + Washi
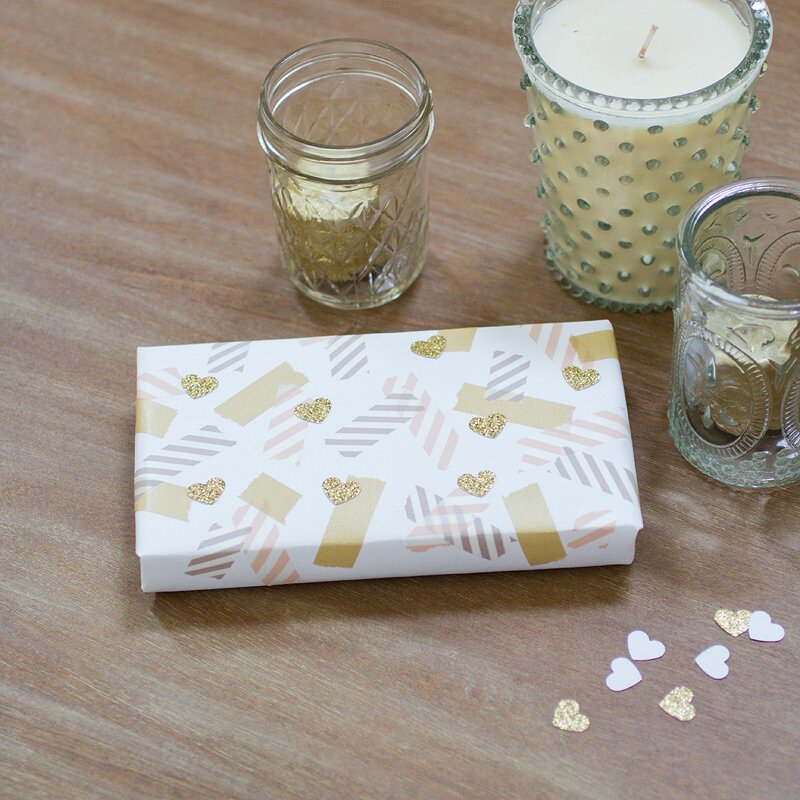
With Valentine’s Day around the corner, here’s a fast (but still super pretty) gift wrap idea for you. Supplies needed:
White wrapping paper + tape
Gold glitter hearts
Washi tape
Glue (preferably not a glue stick)
Wrap your package in the white wrapping paper. Next, take stripes of washi tape and scatter them on the wrapped package. Vary the lengths and patterns for that handmade touch. I chose pastel hues in honor of Valentine’s Day. After that, dab a bit of glue on a golden heart and place it where you think it’ll look nice. Repeat until you’re happy with the results.

By Anastasia Marie
1 comment
Leave a Sweet Comment

Stars have been a constant theme for Christmas time, so I think it’s just to put a star-inspired gift wrap post up. Once again, I have favored kraft and gold but this time I added hints of black and white. Packaging supplies needed (besides the scissors and tape) are listed below:
kraft box with lid (I found this one at TJ Maxx last year)
Gold glitter paper (any craft store should carry this)
Glittery clothespin
Metallic twine (the twine shown here are all from Knot & Bow)
Using various colored twine, wrap the box twice around with each color and secure each strand with a knot on the bottom of the box. Hand draw a crooked star on the back of the glitter paper and cut it out. Don’t try to be crooked; it’ll come naturally as you hand draw. For the final touch, pin the star on top of the box with the glitter clothespin. Use star as a mini tag if you’d like.


By Anastasia Marie
1 comment
Leave a Sweet Comment
-
Bee Eastman
Do you do consultations on new package wrapping?

The majority of us crafters today have a roll of washi tape somewhere, right? This gift wrap idea requires just a few items to get this look. And if you’re not digging the gold, you could always go with lots of other colors and still look incredible. You could either stay monotone (like I did with the gold), or you can coordinate colors like green + silver or red + gold for a more spunky look. Packaging supplies needed (besides the scissors and tape) are listed below:
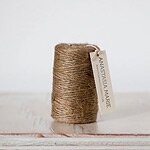
Light brown kraft wrapping paper (the one I used is from Target)
Gold washi tape
Gold glitter string
Mini wooden gift tag
After wrapping your gift up with the kraft wrapping paper, rip off pieces of the gold washi tape and scatter over the top of the package and cascade several pieces down each side. A trick to make wooden gift tags reusable is to stick a piece of washi tape onto the tag and use that as your writing surface. Wrap the glitter string around the box, tie the loose ends together on top in a bow, secure the gift tag, and voila! All that’s left is to write the name on the tag and you’re ready to go.

By Anastasia Marie
No comment
Leave a Sweet Comment
Gift Wrap: Touch of Rosemary

This week’s gift wrap idea is bringing a bit of the outdoors in. I have these rosemary bushes growing alongside our house by the sidewalk that the city planted and they have not been taken care of. At all. They are half dead and I’m looking forward to reviving them. I was happy to find out it was rosemary. My desire to secretly get rid of them in the middle of night died and was replaced with a desire to bring them back to their glory days.
To recreate this gift wrapping, take a large piece of white paper. Grab some black paint, preferably in a bottle that you can squeeze small amounts out at a time. Find something that has a circular bottom. I chose another bottle of paint for this. Apply paint around the bottom of your circular find, but only on the edges. Then dab onto the paper and repeat until you get a nice pattern going. Let the paint fully dry.
Next, dab glue dots in a circle on the inside of each of your paint circles. Sprinkle a mix of fine gold glitter and chunky white glitter over the glue and let dry. Then use that sheet of paper to wrap your gift.
Once wrapped, wind some jute around the package and tie into a bow right down the middle. Add sprigs of rosemary with the buds still attached and a bright yellow corrugated gift tag (that’s coming to the shop real soon!). And you’re done!


By Anastasia Marie
No comment
Leave a Sweet Comment
- Next Page »
© 2015 Anastasia Marie. All Rights Reserved.
I’m totally crushing on gold right now. This is seriously the cutest packaging ever. I may just do something like this for my husband’s gift. Thanks!
http://xfallenmoon.blogspot.com/